Springtime brings the advanced Astronomy Methods class along with the setting of the winter constellations. We now have largely unobstructed views out of the Milky Way and into the realm of the distant galaxies. Scanning the skies are numerous surveys, too, many looking for things that change up in the sky, including supernovae.
This spring’s brightest supernova has been (and still is) SN 2026fvx discovered on 2026/03/17.986 by the Large Array Survey Telescope (LAST). LAST was designed to work with wide fields of view and high speed imaging cadence to note and discover transients in optical wavelengths, things like supernovae and variable stars. More can be found here if you are interested. If interested in seeing a list of recent supernovae discoveries see here. It is pretty amazing.
Upon discovery, SN 2026fvx was noted as being BRIGHT, at magnitude 14.0 and rising. It is also located favorably in the northern sky in the constellation Hydra in a galaxy NGC 4205. Add to all this wonderful news is that this is a Type Ia Supernova, ones that are a type of standard candle which astronomers can use to determine distances to their host galaxies. What is there not to like?
New Hampshire weather!
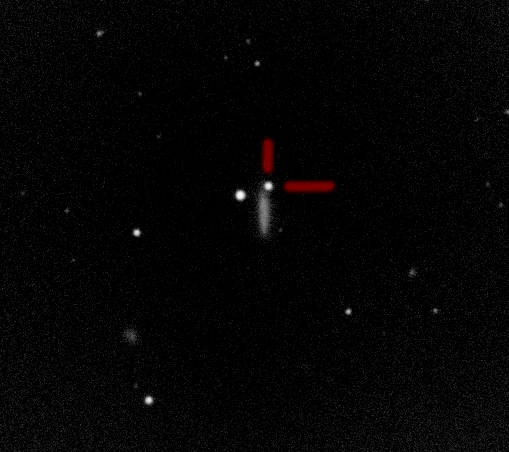
After a few days we had a single clear night this week, and got the 0.7m telescope into work to capture images to do photometric studies of this supernova. While the night was clear, there was a waxing gibbous Moon, making for some significant light pollution from our nearest astronomical neighbor. We got images…. and they are fine. Here is a stack of 5x2minute integrations through the V filter. Joy!